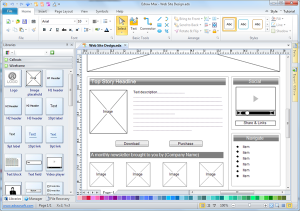
Balsamiq Wireframe

Learning Balsamiq: Starting the Wireframe PT. 2

At this point you should have Balsamiq installed on your computer to begin wireframing the proposed site. For more information about what I’m doing I’ve written an article and posted a video that should get you up to speed. The video is only about 4 minutes so if you’re not sure what this is about, please take a moment to watch it. The link to both the article and the video is here.

In this article and video I jump into Balsamiq and start with the layout. I make some mistakes along the way and I ended up clipping off about 3 minutes of the video because I made a very big mistake. I made the error of thinking that if I added a link that saved it to a duplicate page, that the link would be transferred over to the page Balsamiq created. Oh well, did I mention I’m learning? 🙂

The video goes over the menu, canvas, option window and adding assets. I touch on how to crop an image and changing items on different elements on the canvas.

The video is located on youtube at

Share
Balsamiq Wireframe

Learning Balsamiq: The Brief

Alright, so I mentioned in a previous article that I decided to blog as I learned Balsamiq Wireframing. I’m not going to go into why I am just now learning wireframing, you can read the article when you get the chance.

The first step in any project is that we have a goal and a means to meet that goal. This project was given to me by a friend who wants a web site that will allow him to monitor his art project. Pretty simple, right? Well, not really. When I questioned him further it turns out that it could end up being beyond my web capabilities, but I wanted to give it a try. So here is the brief.

What I was told

The idea behind his art project is to create many (unknown the exact number, but probably about 100) small sculptures that would be cheap to make and would last a while. They would probably be made out of some tough resin so each one will last. I don’t know the exact size, my assumption is that they are about 12″ tall. Each sculpture would be placed around the US by people that he knows. An example would be that person A would place it at the corner of a street in Chicago, person B could leave it at a metro station Dallas, Texas. You get the idea, a hundred of these scattered around the US.

What he wants for his site:

He wants a site that would record what happens to each of the sculptures. A way to log the location and any other information that a person would be willing to add. Each piece would have a distinguishing mark or number to identify it and the web site url. The sculptures would not have any aids like a sensor to record where they are. The info must be added by a person.

After that there isn’t too much info about the details. He’s not sure if gps should be used or if just someone using a form to add information is enough. He did mention that there needs to be as little information about the project as possible. In other words he wants to see what happens with the pieces without interference from anyone. If the sculpture get thrown away, that’s fine.

That’s generally what I know about the project. I am leaving some info out because it’s his project and I don’t want to broadcast it without his permission.

What is needed for the site:

These are my initial thoughts and until I change them, the wireframing will be based on them. He may come back and want something different, but for now I’m going to proceed this way.

  1. There must be a way for people to enter information about a sculpture. It must be dynamic and allowed to be modified.
  2. A basic info page about the project, but not too much info.
  3. Browse ability to see where individual sculptures are located and to allow someone to see where the piece has been.
  4. Less info is better, so no explanations or hints.
  5. Allow comments

Resources needed.:

  1. mySQL database
  2. Geolocation ability based on IP (can be over-ridden by person)
  3. Map of the sculpture’s location based on the IP address.
  4. The ability to upload images/selfies with sculpture. He didn’t request this, but I think it would be warranted.

How I’m going to proceed with Balsamiq:

I think four pages are needed, remember that less information is wanted.I think that’s it. It sounds really simple on the surface but the development of the backend may be difficult.

  1. Home page
  2. Browse
  3. Add
  4. Search

Okay now that the basics are complete I hope that you follow along as I create his site in Balsamiq. Remember, this is about learning wireframing and all the other stuff is not important. What I mean by that is that it is entirely possible that WordPress (or some other program) would be able to do what he wants with less hassle.


Share

Learning Balsamiq Wireframing

A few years ago I started hearing about using wireframing to do mockups of web sites and apps. Prior to this I had been the type of person that I just opened up either Fireworks(yes, Fireworks) or Illustrator to start getting an idea of where the site would end up. It was not something that I was taught to do, it just seemed natural to get a cup of coffee, sit down, and start creating. That was, like I said until I started to hear more and more about people using wireframing to mock up a web site or app.

“I tried different software and no matter what I did, it was just too boring. “
My first few goes at trying this method didn’t go very well. I tried different software and no matter what I did it was just too boring. I couldn’t connect to it visually and as an artist I decided that it wasn’t for me.

So what changed? Well, the truth is that I want to stay current with standards and procedures when it comes to my area of study. Eventually I came to the conclusion that this was a skill that was required, and even if I didn’t use it for my own layouts, I needed this tool in my proverbial toolbox.  I also believe that new methods and techniques are usually useful so I decided to give wireframing another try. This time I researched as much as I could about why it’s useful, who benefits, and which application would fit me the best.

I found out that the majority of people, if the web is to be believed, used either Sketch, Adobe XD, or Balsamiq. The other software recommended were too specific to platforms or intended use. What I mean by that is much of the software was specific to mobile app wireframing, or maybe wireframing on mobile. Some were PC apps and some were mostly for a team to work together on. Since I’m working alone on a Mac laptop and am only really concerned about web sites, many of these didn’t seem to interest me right now.

Basalmiq Logo

I ended up choosing Balsamiq Wireframes as my learning platform since it seems fairly intuitive and their documentation looks to be complete. I’m just guessing about the documentation right now and no doubt I will eventually find out.

As I work through the learning curve of wireframing on Balsamiq I thought that it might be interesting to others if I share what I’m doing as I teach myself the ins and outs of the software. I’ve worked with it a few times now and I think I’ve got a fairly good handle on it, but like most software it probably has secrets and hidden gems that I have yet to discover.

If you’re like me and never really spent time wireframing, then I hope that you’ll follow along as I learn. Maybe you will let me know if there was a trick or something that I should have done. The only thing I’m not sure of is if I should write articles or do videos. possibly both are warranted.

Share